Accessing COSMOS
This section describes how to access COSMOS including user account creation and navigation of the application.
- Logging In
- Creating a New Account
- Dashboard
- Open an Existing Project
- Create a New COSMOS Project
- Import a Project from a Backup
- Exporting a COSMOS Project
- The COSMOS Environment
- The COSMOS Toolbar
- More Details Toolbar Option
Logging In
The first page presented to you when reaching COSMOS, is the login screen. There are three options available to you:
- Login with the default username and password for COSMOS, provided to you by the Living Lab team;
- Login with details provided by an administrator of COSMOS; or
- Create an account.
Once succussfully authenticated, you will be directed to the Dashboard.

The ability to 'Create an account' is an adminstrative function controlled within the COSMOS administration feature. Additionally, this function only becomes operational when both the 'Enable new user self-registration' and 'Email' options are enabled in 'Settings'.
Creating a New Account
In the event you have not been invited to COSMOS, or you wish to register a new account, it is possible to 'Create an account' to access COSMOS. To do this, enter your name and a valid email address. A link to finalise the completion of your new account will be sent to the provided email address.

Upon clicking register, the following notificaiton will appear:
![]()
Within the email will contain a link to the password reset function where you will be asked to supply a password containing 8 or more characters.
Click the 'Submit' button to save your password.
Depending on the email settings of COSMOS, email used to create a new account may be sent to Spam or Junk folders. Please check these folders. Should there still be issues, please contact info@livinglab.org.uk for further assistance.
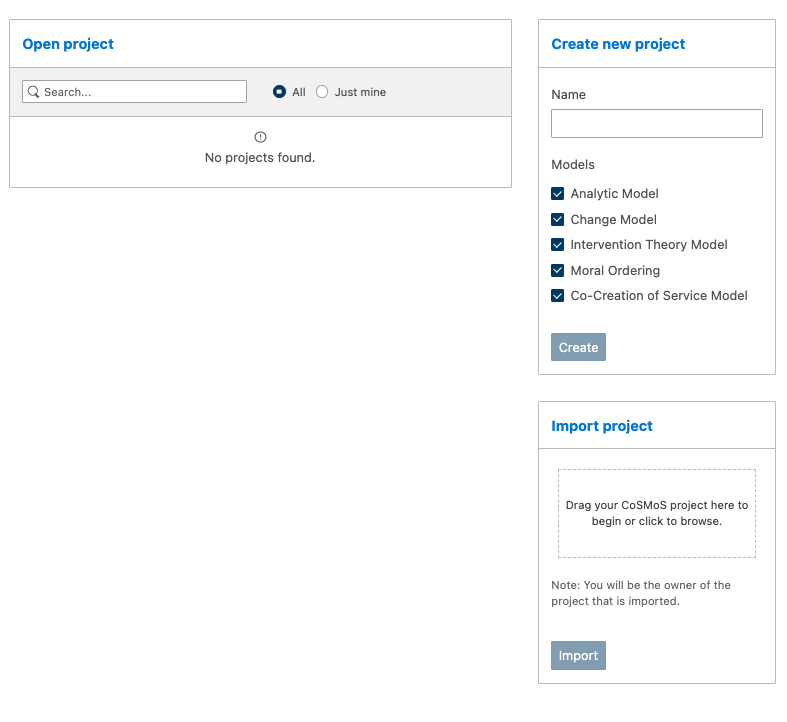
Dashboard
Once logged into COSMOS, you are presented with three main areas within the Dashboard.
These are:
Open project: Where a project has been previously created, these will be visible in the list. It is also possible to search for existing projects and also to display all COSMOS projects, or just display those that you have created.
The ability to see 'All' projects depends on the permissions granted to you by the COSMOS administrator. By default, you will not have permission to see any other projects.
Create new project: When needing to create a new COSMOS project, it is possible to do so from this area. Also, specific models that should be included in the project are also selected here.
Import project: In some cases, it might be necessary to import an existing COSMOS project. This might be necessary to move or duplicate an existing project. The imported project can then be updated whilst preserving the original version, for example.
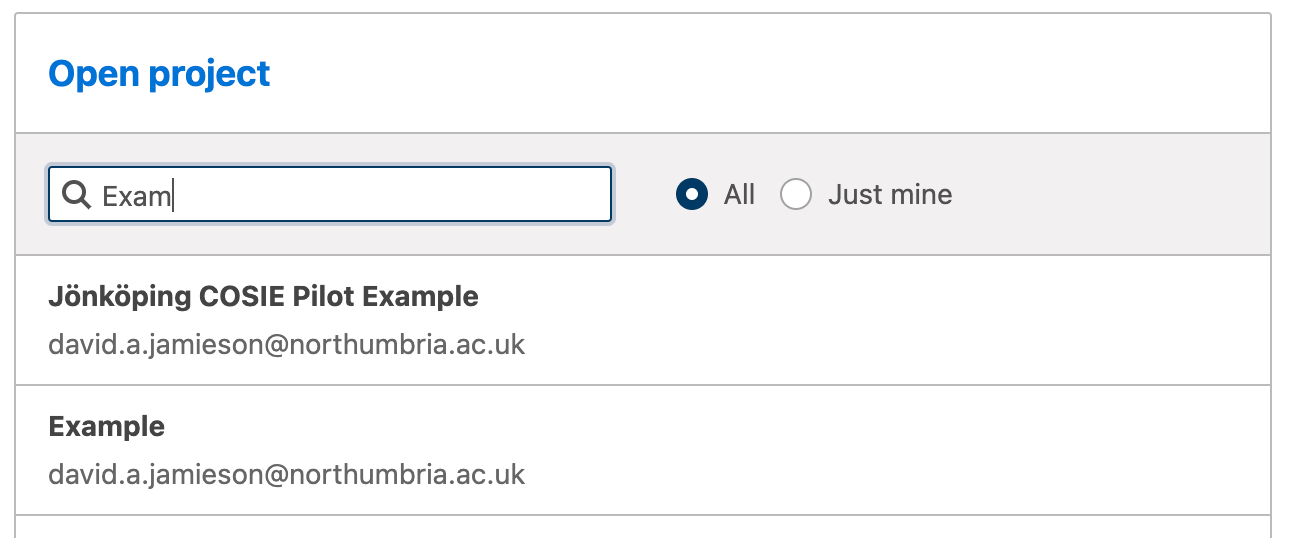
Open an Existing Project
To open an existing project, simply click on the name of the project in the list. This will then open the project in either editing or viewing mode depending on your permissions on the project.
To search for an existing project, begin typing the name of the project into the 'Search' text box. The list of projects will automatically begin to display matching search results. From here, click on the name of the project to open it:
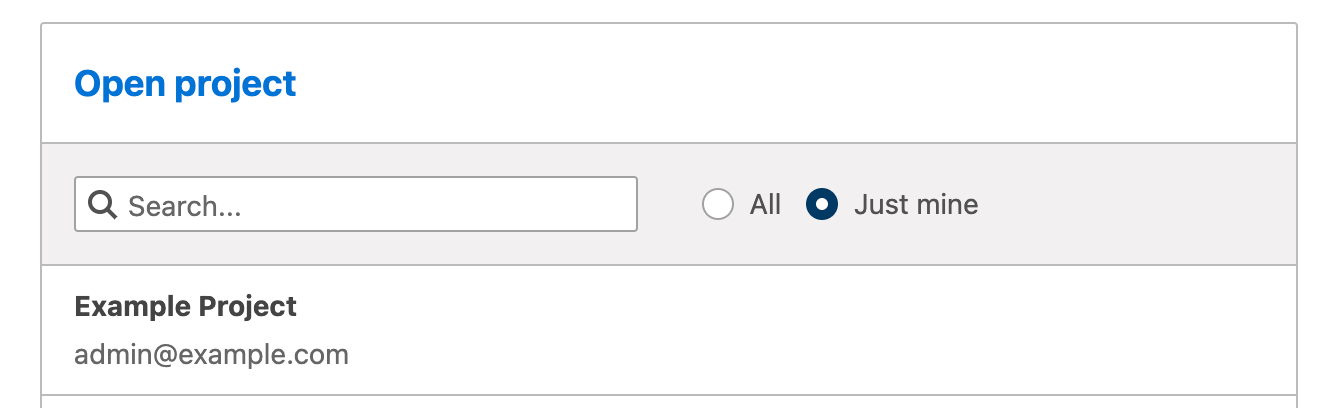
To view only your projects, click the 'Just mine' button. This will display just the projects that have been created by you. This button also works with the search function too: the search results will just return those that match the search criteria and your own projects. Click on the name of the project to open it:
Create a New COSMOS Project
The COSMOS Dashboard makes it really simple to create a new COSMOS Project. In the 'Create new project' section of the Dashboard, enter a name of your project in the 'Name' field.

Once entered, select from the Models listed which of those you would like to be included witin your new project. By default, all projects are selected. Once selected click the 'Create' button which will then create the project and take you into the COSMOS Environment.
Import a Project from a Backup
In the even that you wish to move or restore a back up a COSMOS project, this is completed using the Import project feature form the Dashboard.
In order to import a project, it is first necessary to export a current project. The ouput of the export is a .zip file.
To import a COSMOS project, drag the exported COSMOS, in .zip format, to the dotted-line box or click in the dotted-line box to open your file browser on your device. Navigate to the COSMOS project - again in .zip format - select 'Open' and then click 'Import'.

The imported project will appear at the bottom of the 'Open project' list.
When the project is imported, you will then become the owner of the project.
Exporting a COSMOS Project
From the COSMOS Toolbar, it is possible to export a COSMOS project in it's entirity. The exported file - in .zip format - can then be transported and imported into another COSMOS instance
In order to export a project, click the 'Export' button from the COSMOS Toobar. This will immediately download the export to your device.
The default file name of the export will be cosmos-{name_of_project}.zip. From here, the export can be imported to another COSMOS instance, or as a new COSMOS project.
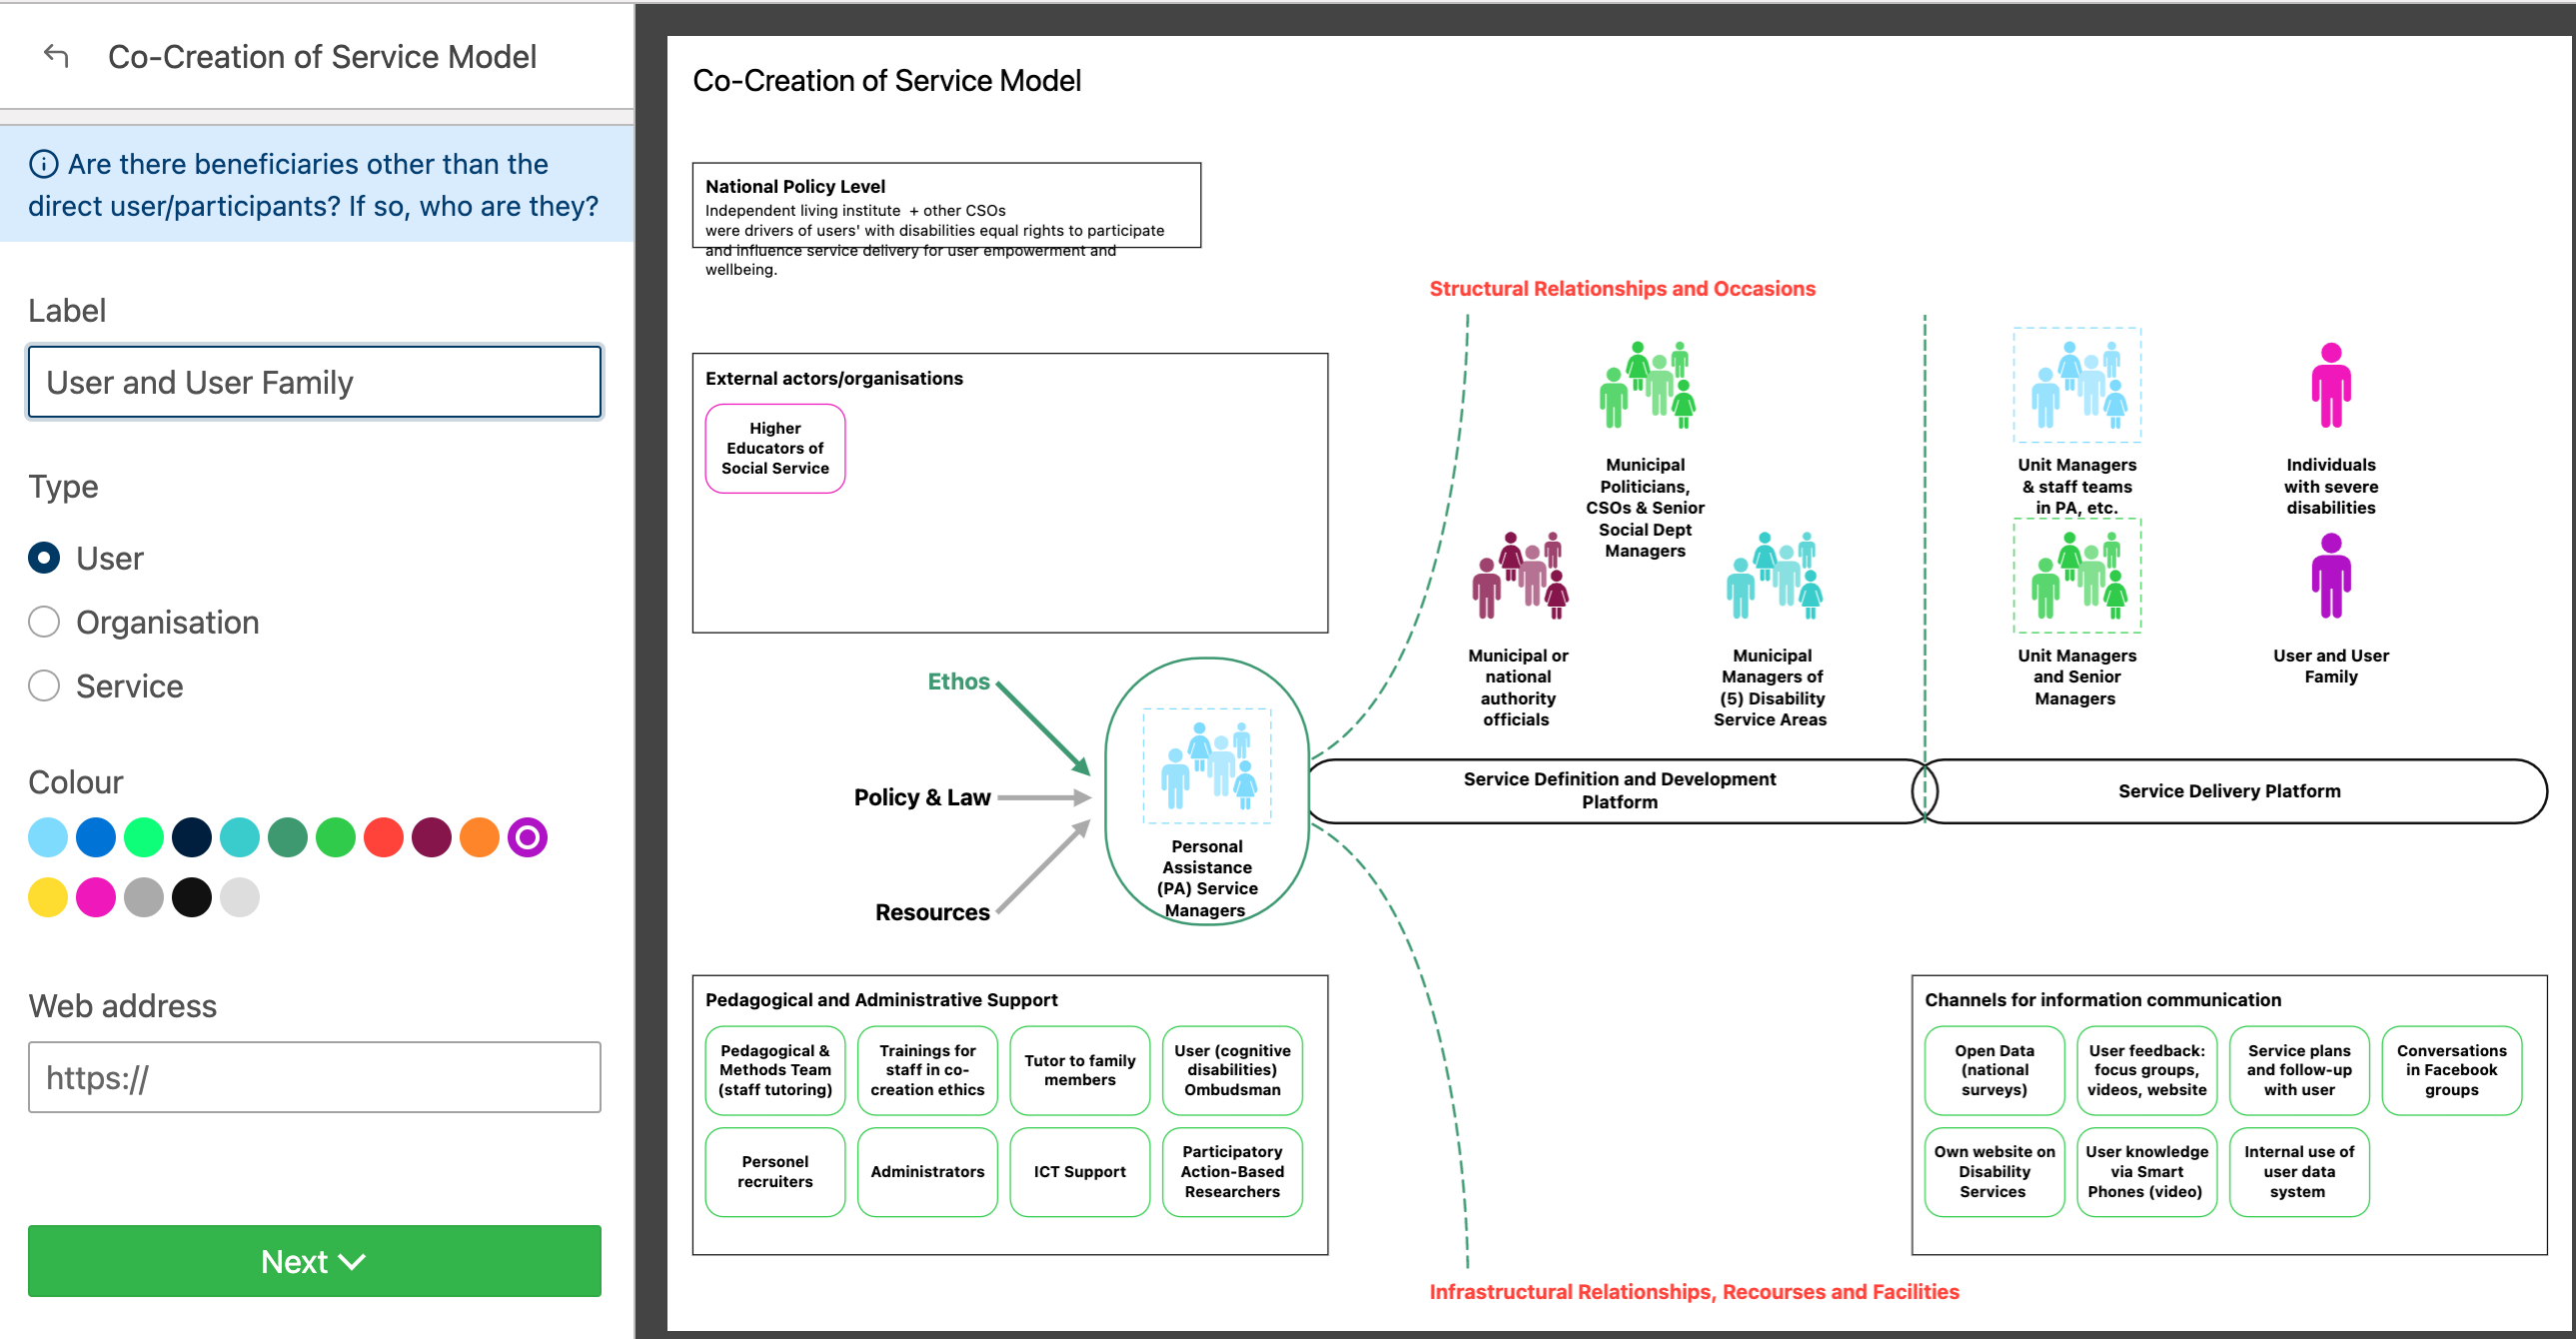
The COSMOS Environment
The COSMOS Environment is divided into three sections: the COSMOS Toolbar which runs along the top of the screen, the Side-Bar Menu which contains the Project Navigation and Model Questions on the left, and the Responsive Model Canvas on the right.
The way in which COSMOS works is based on the input provided from the Model Questions. When answers are provided and completed, the answers to these questions are then displayed, in real-time, in the Responsive Model Canvas:
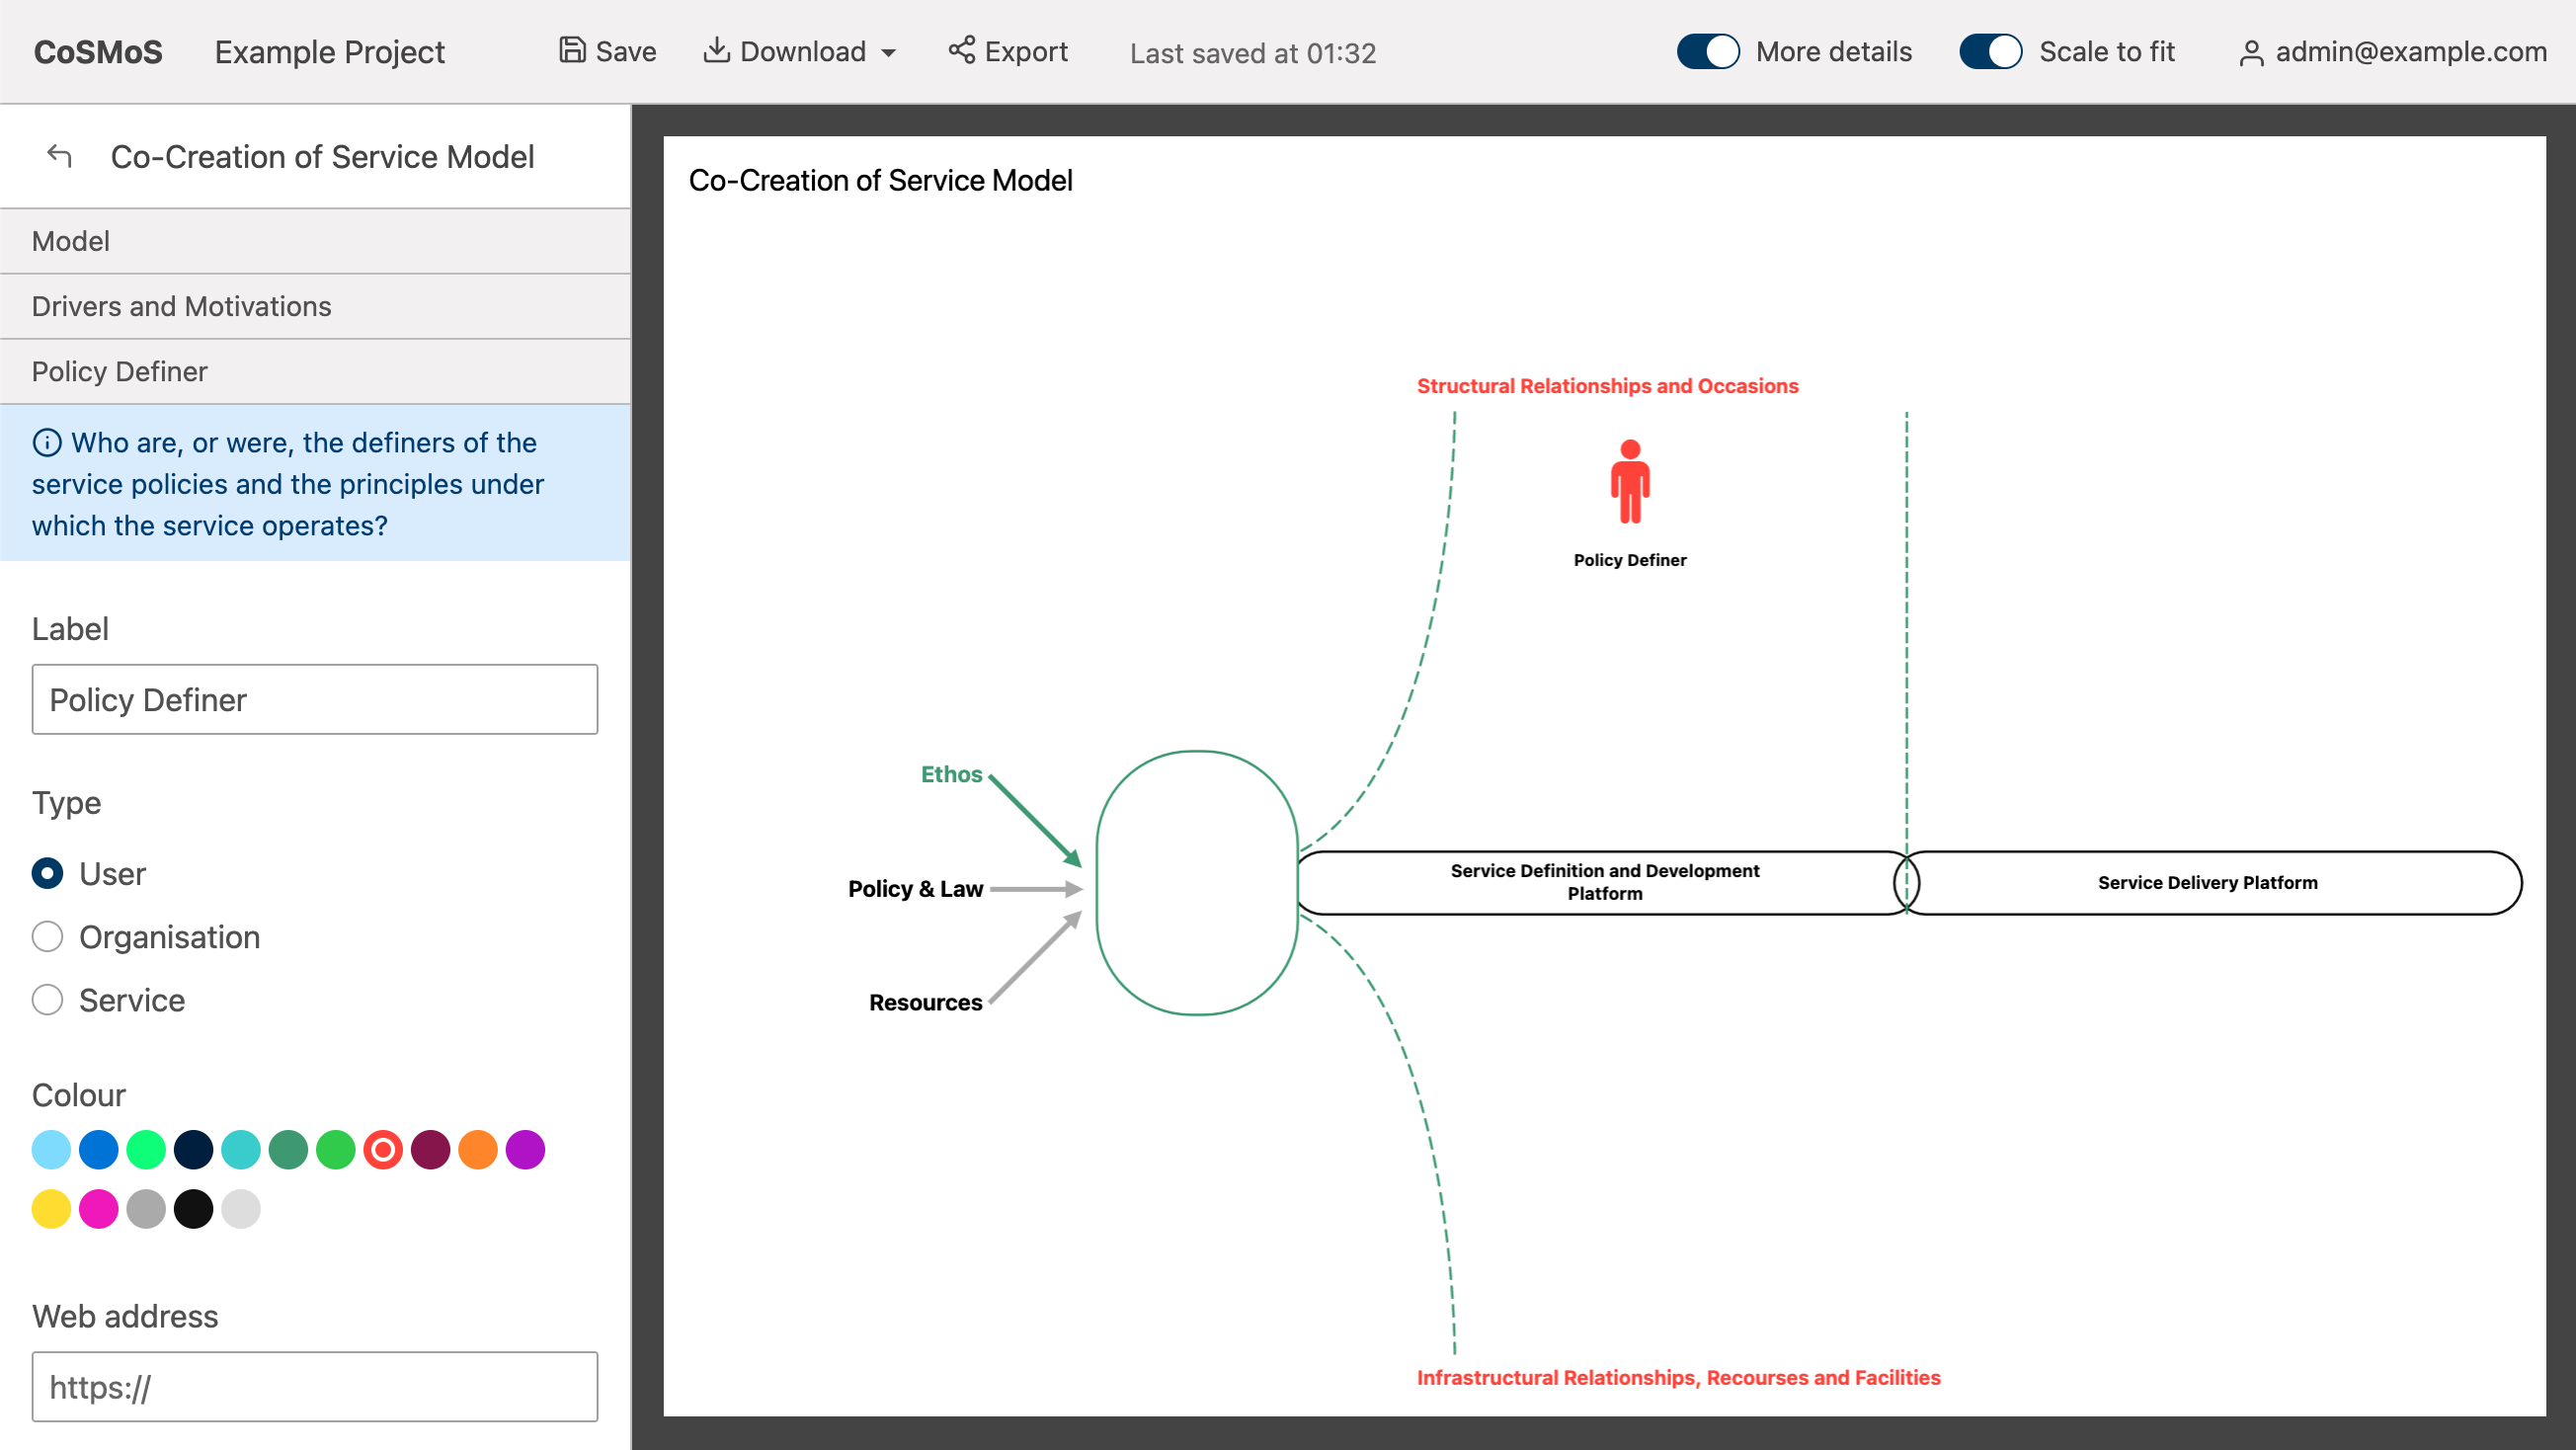
As more responses are provided, the Responsive Model Canvas provides a completed visualisation of the model:
The COSMOS Toolbar
The COSMOS Toolbar is a constant set of tools relating to COSMOS projects:

It provides access to the following features:
Save: This is a manual way to save your current progress. If automatic saving is disabled by your adminsitrator, clicking 'Save' will store the current progress of your project.
Download: By clicking 'Download' it is possible to export the current COSMOS model in it's current state in PDF or .PNG formats. The 'Download' function allows for a snapshot of progress to be created in either format.
Export: COSMOS allows for the exporting of projects. This allows for the moving and duplication of projects across users and different COSMOS instances.
Last saved at: This is a visual indictator as to the last time the project was saved within the current session.
More details: 'More details' is a feature whilch allows for users to enter more information into the Responsive Model Canvas area within COSMOS models. Toggling this will disable the creation and display of 'Moore details' within the Responsive Model Canvas. It is enabled by default.
Scale to fit: On occaison, the size of the Responsive Model Canvas within COSMOS is too big for the current display. Toggling the Scale to fit on will resize the canvas to fit to the size of your display. It is disabled by default.
Username: This displays the current, logged on user accessing the COSMOS project. By clicking on this, it directs the user to their account details where it's possible to change email address and password.
Language: Clicking on this changes the native language of COSMOS. The current options are: English, Greek, Spanish, Hungarian, Finnish, French, German, Polish, Italian, Dutch, Estonian, and Swedish.
More Details Toolbar Option
By double-clicking anywhere on the Responsive Model Canvas, it is possible invoke the the 'More details' pop-up box. 'More details' allows the End User to discretely record more information directly on to the canvas:
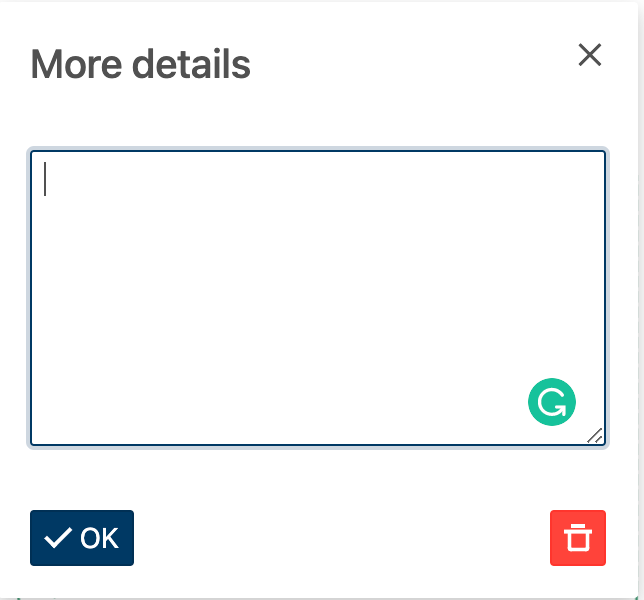
'More details' appear on the canvas as an ![]() icon. This icon can be dragged around the Responsive Model Canvas to be placed in a more convenient location. Equally, an unlimited number of 'More details' can be added.
icon. This icon can be dragged around the Responsive Model Canvas to be placed in a more convenient location. Equally, an unlimited number of 'More details' can be added.
Should a 'More details' be required to be deleted, simply click on the ![]() icon, and then press the trash can button.
icon, and then press the trash can button.
The ability to use the 'More details' feature is dependant on whether the End User has the correct roles - in this case, the Edit and Admin roles - for the project. Also, the 'More details' feature can be toggled off - via the COSMOS Toolbar.